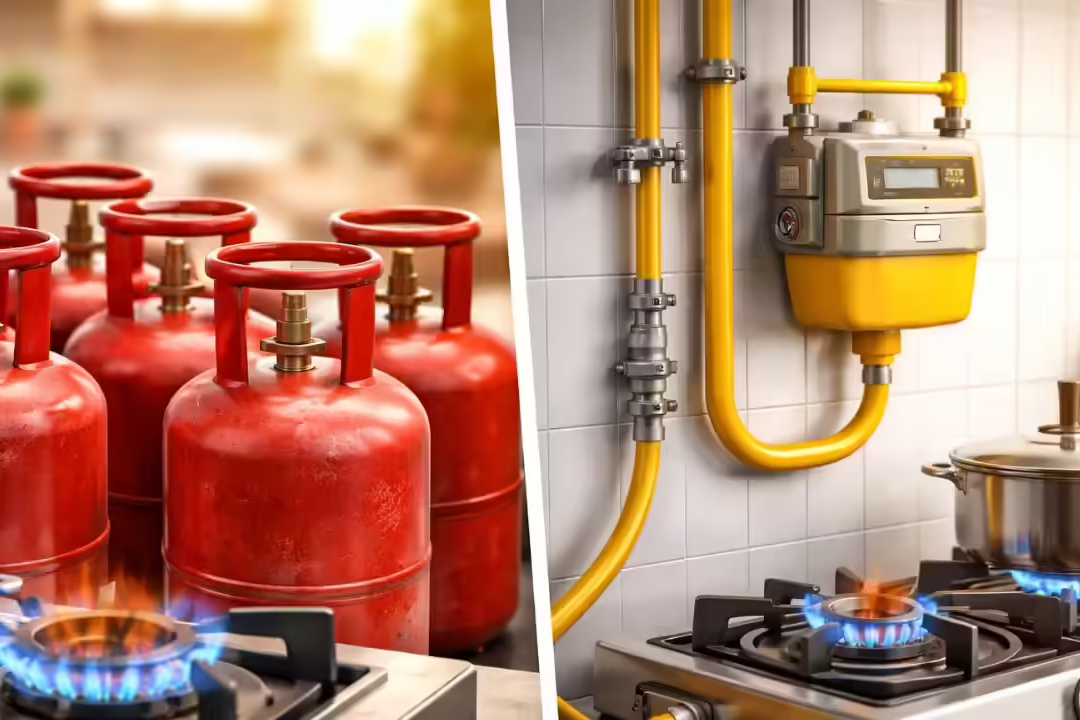
Switching to Piped Natural Gas (PNG) is a significant home upgrade that offers safety, continuous supply, and space-saving benefits. If you are looking to move away from traditional LPG cylinders, here is the exact process to follow and tips to ensure your application is approved quickly.
The Standard Application Process
To get a new gas pipeline connection, most providers follow a four-stage process. Having your documents digitized and ready is the first step to success.
1. Document Preparation
You will typically need the following documents in PDF or JPEG format for the online application:
- Proof of Identity: Aadhaar Card, Voter ID, or Passport.
- Proof of Ownership/Occupancy: Latest Electricity bill, Water bill, or House Tax receipt (must be in the applicant’s name).
- For Tenants: A valid Rent Agreement and a No Objection Certificate (NOC) from the property owner.
2. Online Registration
Visit the official web portal of your local gas distribution company.
- Select the “New Connection” or “PNG Registration” tab.
- Fill in your personal details and upload the required documents.
- Pay the registration fee and initial security deposit through the secure payment gateway.
3. Technical Site Survey
After your application is verified, a technician will visit your premises. They will map out the pipeline route from the main riser to your kitchen. They will check for:
- Wall thickness for drilling.
- Proximity to electrical points (for safety clearance).
- Ventilation in the cooking area.
4. Physical Installation and Pipeline Routing
Once the survey is approved, the installation team will arrive to lay the external and internal GI (Galvanized Iron) or copper piping. The external riser pipes are typically secured to the building’s facade, while the internal piping is routed into your kitchen through a small, professionally drilled hole in the wall. The team will install a dedicated “isolation valve” (yellow handle) near your stove, allowing you to manually shut off the gas supply whenever you are traveling or in case of an emergency. A digital or analog gas meter is also mounted at this stage, usually in a visible location for easy reading.
5. Stove Conversion and Burner Calibration
A critical part of the process is the conversion of your existing LPG stove to be compatible with Piped Natural Gas (PNG). Since PNG operates at a different pressure than bottled LPG, the technician must replace the small brass “jets” or nozzles inside each burner of your stove. After replacing the jets, the technician will calibrate the flame to ensure it is a steady, efficient blue color. It is vital to let a professional handle this; using an unconverted LPG stove with a PNG connection can result in low heat efficiency and dangerous soot buildup.
6. Activation and First Billing Cycle
After the physical installation and stove conversion are complete, the technician will perform a “soap-bubble test” on all joints to ensure there are no micro-leaks. Once satisfied, they will “gas-in” the system, meaning the main valve is opened and the fuel reaches your burners. You will be asked to sign an installation report, which officially triggers your first billing cycle. Most providers bill bi-monthly based on the actual SCM (Standard Cubic Meters) consumed, which you can monitor via the newly installed meter.
7. Final Safety Inspection and Pressure Test
Before the gas flow is officially turned on, a certified safety inspector will perform a “pressure test” on your internal piping. This involves using a manometer to ensure there are zero micro-leaks in the joints or valves. It is a critical step that cannot be skipped; ensuring someone is home to witness this test will prevent the technician from marking your site as “inaccessible,” which can delay your activation by weeks.
Understanding the Billing and Metering System
One of the biggest advantages of a pipeline connection is the “pay-as-you-use” model, similar to your electricity bill. Most providers use a digital or analog meter installed near your kitchen entrance to track consumption in Standard Cubic Meters (SCM). Understanding how to read this meter will help you monitor your usage and identify any unusual spikes early on, ensuring you are never overcharged for your domestic consumption.
Long-Term Maintenance and Gas Safety
Once your connection is live, the pipe requires very little active maintenance, but you should never paint over the yellow gas pipes or use them to hang kitchen utensils, as this can corrode the protective coating. Every two years, it is recommended to have a technician inspect the flexible hose connecting the pipe to your stove. This hose is the only part of the system that experiences wear and tear and should be replaced if any cracks or hardening appear.
How to Make the Process Easier and Faster
Bureaucratic delays are common, but you can bypass them by focusing on these three areas:
- Ensure Name Consistency: The most common reason for rejection is a name mismatch. Ensure the name on your ID proof matches the name on your electricity bill exactly. Even a small spelling difference can cause a delay.
- Verify “Last-Mile” Connectivity: Before applying, check if your neighbors or your building’s “wing” already has gas connections. If the main pipeline is already at your doorstep, your connection can be activated in as little as 5–7 days.
- Pre-Clear the Installation Path: Technicians often skip installations if the kitchen area is cluttered or if they need to move heavy appliances. Ensure the area under the sink and the external wall path are clear before they arrive.
Frequently Asked Questions (FAQs)
What is the cost of a new gas pipeline connection?
The cost varies by provider but usually includes a refundable security deposit for the meter and an installation fee. Some providers offer EMI schemes integrated into your monthly gas bills.
How long does it take to get the connection active?
On average, the process takes 10 to 21 days from the date of application, depending on the existing infrastructure in your locality.
Is it safe to have a gas pipe inside the house?
Yes. PNG is safer than LPG cylinders because the gas is supplied at low pressure. Furthermore, natural gas is lighter than air and will dissipate quickly in the event of a leak, unlike LPG which settles on the floor.
Can I use my existing gas stove with a pipeline?
Yes, but it requires a small modification. A technician must change the burner nozzles (jets) to accommodate the different pressure levels of PNG. Do not attempt to do this yourself.