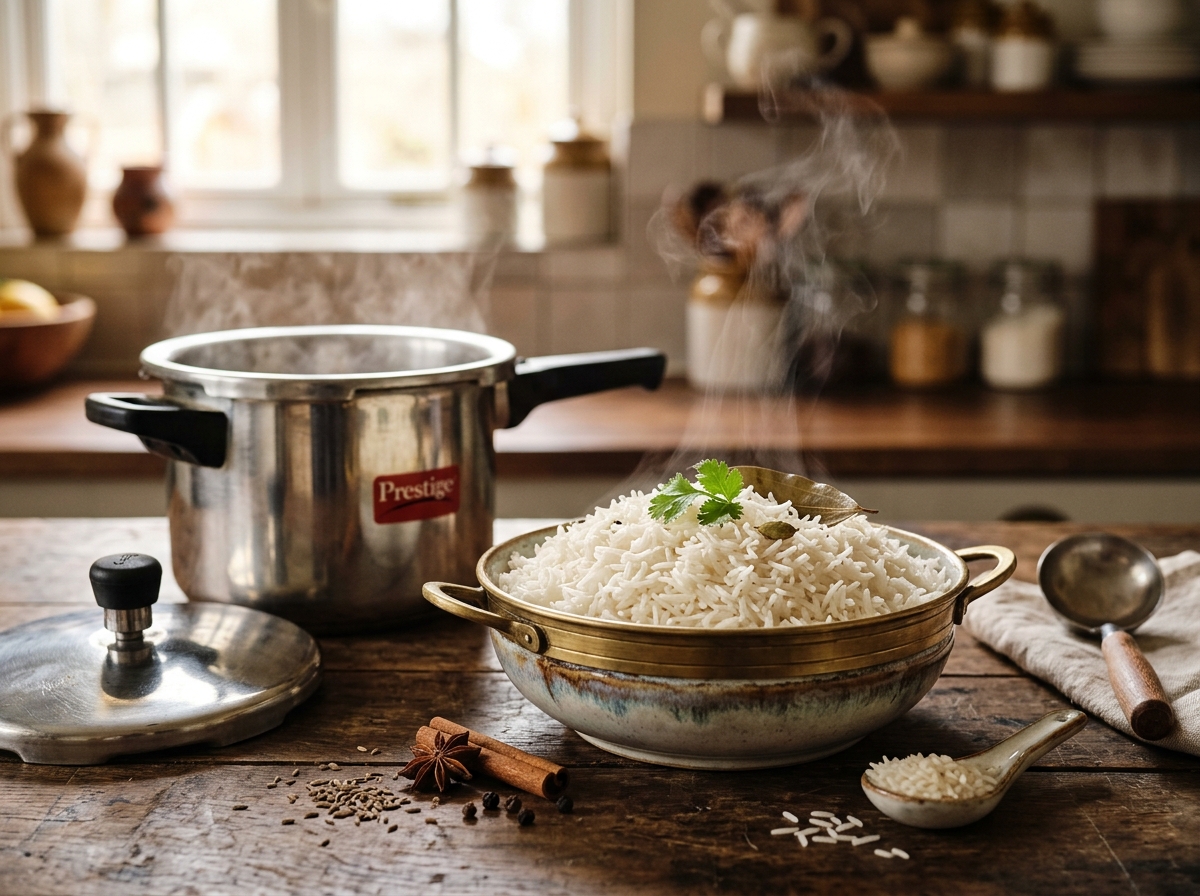
⚡ Direct Answer: How to Cook Rice in Pressure Cooker
The Golden Formula: For 1 cup of soaked white Basmati rice, use 1 ¾ cups water, ½ tsp ghee/oil, and cook for 2 whistles on medium heat. For Sona Masoori or Ponni rice, use 2 cups water and cook for 3 whistles. Always allow 10 minutes of Natural Pressure Release (NPR) before fluffing with a fork.
Cooking rice in a stovetop pressure cooker is a treasured daily ritual in millions of homes worldwide. It is up to 70% faster than open-pot boiling, uses a fraction of the stove energy, and locks in natural grain aroma. Yet, even seasoned cooks occasionally open the lid to find gummy, clumped mush or hard, undercooked grains stuck to the bottom of the vessel.
The secret to restaurant-quality, grain-separated, cloud-fluffy pressure cooker rice is not luck—it comes down to the precise science of starch rinsing, exact hydration ratios, and steam-curing. Whether you are cooking fragrant Himalayan Basmati, everyday South Indian Sona Masoori, Jasmine, or hearty Brown Rice, this comprehensive guide guarantees foolproof perfection every single time.
Master Ratio & Whistle Chart for All Rice Varieties
Different rice grains have vastly different starch compositions. Long-grain Basmati is high in amylose (which stays firm and separate), while short-grain varieties carry higher amylopectin (which naturally softens). Use this master benchmark table for standard 3-liter to 5-liter stovetop pressure cookers:
Direct Method vs. Pot-in-Pot (PIP) Method: Which Should You Use?
When cooking rice in a pressure cooker, there are two distinct techniques. Understanding when to use each will save you cleaning time and prevent kitchen disasters:
1. Direct Cooking Method (One-Pot)
In this traditional method, rice, water, and ghee go directly into the base of the pressure cooker. It is the fastest technique, heats up rapidly, and is ideal when cooking larger quantities (2 or more cups of rice).
- Pros: Fast boiling, minimal dishes, great for seasoned pulaos and biryanis.
- Cons: Potential for a slightly crisp bottom layer if your cooker base is thin.
2. Pot-in-Pot (PIP / Separators) Method
You pour 1 cup of water into the base of the cooker, place a metal trivet or ring, and place a stainless steel bowl (dabba) holding the rice and water on top of the trivet. Cover with a loose lid.
- Pros: 100% zero scorching, cooker body stays sparkling clean, and you can cook dal and rice simultaneously!
- Cons: Takes 2-3 extra minutes to build internal steam pressure.
Step-by-Step: How to Make Fluffy Rice in Pressure Cooker
Step 1: The Essential Cold-Water Rinsing Ritual
Place your measured raw rice in a medium bowl or fine mesh sieve. Cover with cold tap water and gently swirl the grains in a circular motion with your fingertips. The water will immediately turn milky opaque from free-floating surface starches (amylose powder produced during commercial milling). Carefully pour off the cloudy water. Repeat this gentle rinse 3 to 4 times until the water becomes clear enough to see your fingertips beneath.
⚠️ Pro Baker & Chef Warning: Never crush or violently rub rice grains between your palms. Soaked or dried grains will fracture in half, creating tiny broken bits that disintegrate into glue during high-pressure cooking.
Step 2: The 20-Minute Hydration Soak
Submerge the rinsed rice under clean cold water and let it rest on the kitchen counter for 20 minutes (15 minutes for Sona Masoori). During soaking, water slowly diffuses into the crystalline starch lattice of the grain. This ensures that when the intense heat of the pressure cooker kicks in, the grain expands uniformly along its length rather than bursting at the sides. Drain the soaking liquid completely through a colander so you can control the exact cooking water ratio.
Step 3: Measure Water Accurately (Do Not Eyeball)
Transfer the well-drained rice into your cooker or inner stainless steel container. Add exactly 1 ¾ cups of fresh room-temperature water for 1 cup of soaked Basmati rice. If you are cooking medium-grain South Indian rice like Sona Masoori or Ponni, use 2 cups of water. Precision here is everything: an extra two tablespoons of water can make the difference between silky separate grains and sticky mush.
Step 4: The Ghee & Salt Secret
Add ½ teaspoon of pure cow ghee or a neutral cooking oil along with ½ teaspoon of salt. The fat performs two miraculous functions: First, microscopic lipid droplets coat the grain exteriors, preventing them from fusing together as starch gelatinizes. Second, it breaks surface water tension, stopping starchy foam from climbing up and spitting aggressively through your pressure regulator whistle.
Step 5: Lock Lid & Time the Whistles
Check that your rubber safety gasket is clean and pliable, and that the steam vent pipe is free of obstructions. Place the lid on the pressure cooker, turn to lock securely, and place the weight valve on the vent pipe. Turn your stove burner to medium-high heat.
- For Soaked Basmati Rice: Cook until you hear 2 distinct, energetic whistles (takes approximately 6 to 8 minutes). Turn off the heat immediately after the 2nd whistle.
- For Sona Masoori / Raw Rice: Cook until you hear 3 whistles on medium flame. Turn off the heat immediately after the 3rd whistle.
Step 6: The Golden Rule of Natural Pressure Release (NPR)
Resist every temptation to lift the whistle with a fork or submerge the cooker under tap water! Allow the pressure cooker to sit undisturbed on the turned-off stove for 10 to 12 minutes until all internal steam dissipates naturally and the lid safety pin drops completely. During this resting period, the boiling water absorbed by the rice finishes setting the amylose starches. Quick-releasing the steam forces the boiling liquid to violently evaporate, leaving the core of your rice dry and hard while rupturing the delicate grain exteriors.
Step 7: Fluffing and Resting
Remove the weight, open the lid away from your face to avoid the steam cloud, and let the open pot breathe for 2 minutes. Take a wide silicone spatula, rice paddle, or dinner fork and gently turn the rice over from the outer edges toward the center. Watch the glorious, piping-hot, separate grains tumble freely without a speck of stickiness.
5 Science-Backed Secrets to Non-Sticky Grains
- Always Buy “Aged” Basmati: Aged rice (at least 1 to 2 years old) has lower moisture content and mature starch molecules. Young freshly harvested rice contains excessive surface moisture and will invariably turn clumpy. Look for words like “Extra Long Grain Aged Basmati” on the burlap bag.
- Respect the Fat Barrier: A mere ½ teaspoon of ghee or oil changes the surface chemistry of cooking water, sealing starch inside each grain and preventing the whistle from spewing starchy water over your spotless kitchen counter.
- Never Force Release Steam: Quick-releasing pressure shocks the expanding rice grains, fracturing their delicate cell walls. Always let steam settle down on its own.
- Adjust for Cooker Volume: If cooking a single cup of rice in a massive 5-liter or 6-liter pressure cooker, liquid evaporates faster across the wide base. Add 2 tablespoons of extra water to compensate for the larger headspace.
- Rest Before Fluffing: Freshly cooked rice is fragile. Giving it 2 minutes of resting time after opening lets ambient air cool the outer starch film, firming up the grains before you fluff them.
Troubleshooting Common Pressure Cooker Rice Mistakes
Problem: Rice is soggy, clumpy, or looks like porridge (Khichdi)
Fix: You either skipped the 3-cycle rinsing step (leaving too much free starch) or added too much water. Reduce your water ratio from 1:2 down to 1:1.75. To salvage current soggy rice, spread it immediately over a wide stainless steel plate or baking sheet—the trapped steam will evaporate in minutes, helping grains firm up.
Problem: The bottom of the cooker is burnt or browned
Fix: This happens when you cook on excessively high heat or use a lightweight aluminum cooker with a thin base. Switch to medium heat after sealing. Alternatively, switch to the Pot-in-Pot (PIP) method, which completely guarantees zero burning.
Problem: Starchy water is bubbling and sputtering out of the whistle
Fix: Surface starches are foaming under pressure. Always wash rice until water is crystal clear, never fill the pressure cooker beyond the halfway mark, and always add ½ teaspoon of ghee/oil.
What to Serve with Fluffy Pressure Cooker Rice
Steaming hot, fragrant pressure cooker rice is the ultimate comforting canvas for traditional home cooking. Here are our favorite tested pairings from the Budhi Madhi kitchen:
- Rich Meat Curries: Nothing elevates a Sunday lunch like ladling rich, deeply caramelized gravy from our Authentic Bengali Chicken Kosha Recipe over a bed of warm basmati rice.
- Festive Vegetarian Curries: Pair everyday Sona Masoori rice with the rich spiced vegetables of our Traditional Bengali Bhoger Labra.
- Dal & Ghee Classic: Top hot rice with a dollop of homemade ghee, yellow tadka dal, a squeeze of fresh lime juice, and a side of crispy Masala Fried Idli or Spongy Gujarati Dhokla.
How to Cook Perfect Rice in Pressure Cooker
Ingredients
Core Ingredients
- 1 cup white rice (Basmati or Sona Masoori) 200g, aged long-grain preferred
- 1 ¾ cups water use 1.5 to 1.75 cups for Basmati, 2 cups for Sona Masoori
- ½ teaspoon fine sea salt optional, enhances grain flavor
- ½ teaspoon ghee or neutral cooking oil essential to keep grains distinct and prevent foaming
Optional Aromatics (For Flavored Rice)
- 1 small bay leaf (tejpatta) optional, adds warm fragrance
- 2 whole green cardamoms optional, crushed
- 1 teaspoon lemon juice keeps grains gleaming white
Instructions
Rinsing & Soaking (Crucial Step)
- Rinse the rice: Place 1 cup of rice in a fine-mesh strainer or bowl. Gently swirl under cold running water 3 to 4 times until the water runs clear. This washes away excess surface amylose starch that causes gummy, sticky rice.
- Soak the grains: Submerge the rinsed rice in fresh water for 20 minutes for Basmati (15 minutes for Sona Masoori). Drain completely in a colander.
Pressure Cooking & Whistle Timing
- Add to pressure cooker: Transfer drained rice to the pressure cooker. Pour in the measured water (1.75 cups for Basmati, 2 cups for Sona Masoori). Stir in ½ tsp salt, ½ tsp ghee or oil, and aromatics if using.
- Seal and heat: Close the lid securely and place the weight valve (whistle) on top. Turn the stovetop to medium-high heat.
- Whistle count: For soaked Basmati rice, cook for 2 whistles on medium heat. For Sona Masoori or Ponni raw rice, cook for 3 whistles on medium heat. Immediately turn off the heat.
Natural Release & Fluffing
- Natural Pressure Release (NPR): Allow the pressure cooker to release its steam naturally for 10 to 12 minutes. Never force open or lift the whistle early—the trapped steam finishes cooking the starch core evenly without making the rice mushy.
- Fluff with a fork: Once the safety pin drops, open the lid away from your face. Rest for 2 minutes, then gently fluff the rice with a flat silicone spatula or fork from the edges inward to separate the grains without breaking.
2 thoughts on “How to Cook Rice in Pressure Cooker (Foolproof Water Ratio & Whistle Guide)”
Comments are closed.